We’re currently on lab testing methodology 1.2.
Keeping quality assurance in mind while reviewing footwear is crucial for ensuring that the review is objective. This is where Footwearguru comes in. Hi Guys, I am Thomas Benefield, and I will describe how Footwearguru checks a shoe before reviewing it. I received a quality report on the shoes from Gary V. Paul, who is the quality checker. In light of Paul’s report, I post an authentic review for you guys. So let’s get to it and explore how it works.
Paul test the quality in two steps:
- Primary Check.
- Deep Check.
Primary Check
The Primary Check is divided into seven steps.
- Flexing Check.
- Bonding Check.
- Seaming Strength Test.
- Fitting Check.
- Appearance Check & Size Measurement.
- Weight measurements.
- Width measurements.
Flexing Check
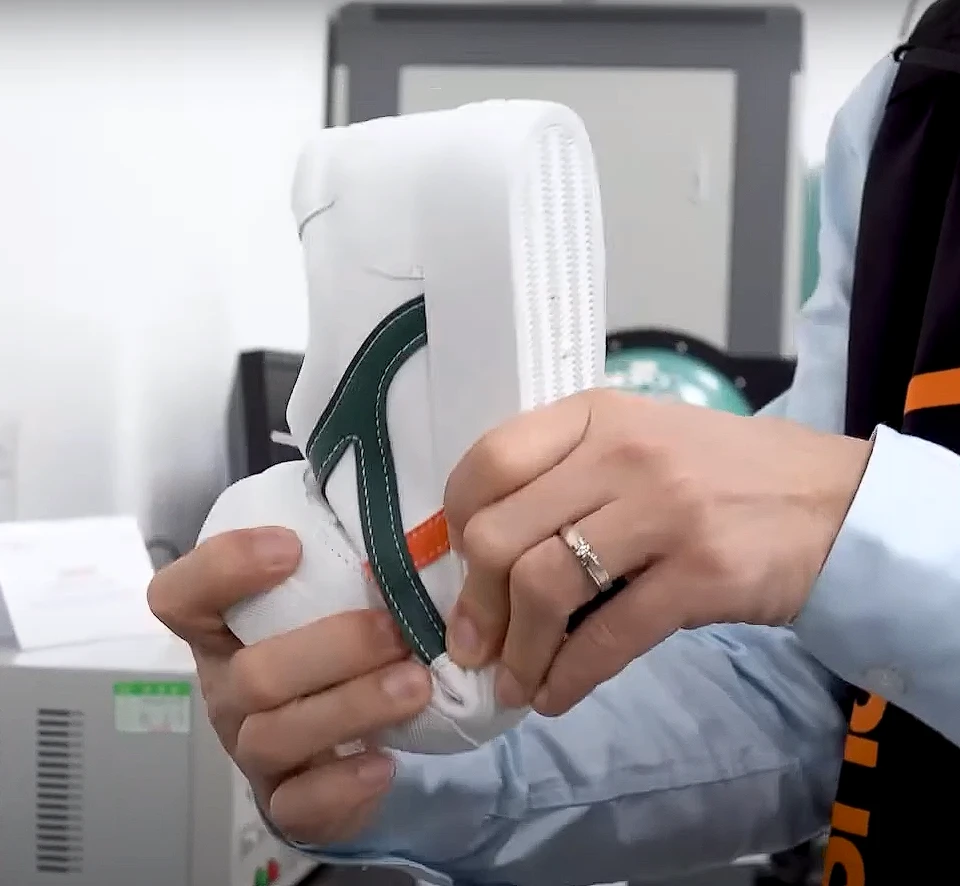
In inspecting the shoes, Paul pays special attention to the quality of the materials. As a result, Paul underwent a flexing check of the vamp. He flexed the vamps of the shoe 20 times to check the quality of the sole and the dampness.
A digital force gauge is another way to do it. Paul measured how hard it is to bend a shoe at its natural point of bending by bending it from 0 degrees all the way to 90 degrees. Most of the resistance will be found between 20 and 30 degrees.
Bonding Check
The bonding is performed to assess the joint materials’ adhesion quality. For that, Paul pulls the four points of the shoe at the toe, inner corner, outer corner, and back counter with the maximum force to separate them. If this causes a gap or hole at the bottom edge or a joint to come apart, Paul puts a sticker on that spot.
Seaming Strength Test
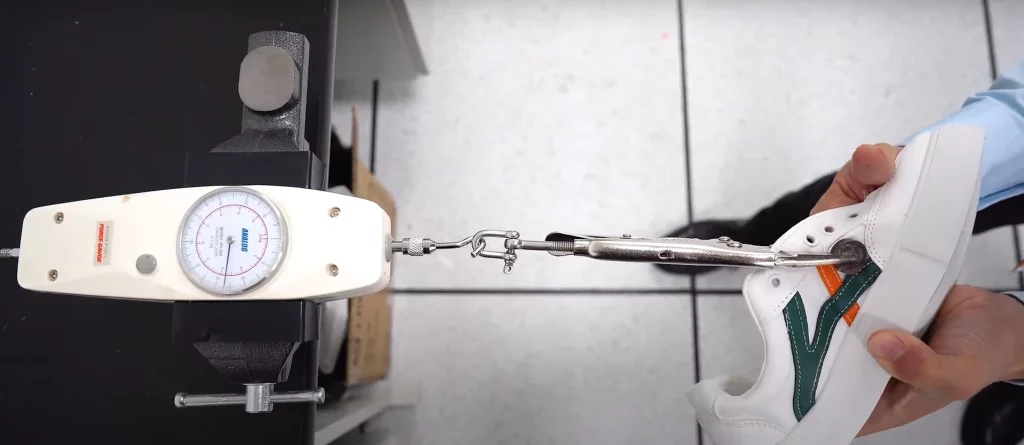
Apart from the quality of materials, Paul inspected the apparent strength of the joint. The shoe materials will be pulled with a force of around 17 newtons. No unacceptable performance such as seam breakage or slippage should be observed to pass this test. If a shoe passes this test, I give full marks for its durability.
If any shoes have the safety of attachments such as buttons, cross straps, or small parts, Paul also verifies the quality of the attachments. They should not detach when the force is applied to guarantee safety when used. The amount of force used for this test depends on the size of the attachments.
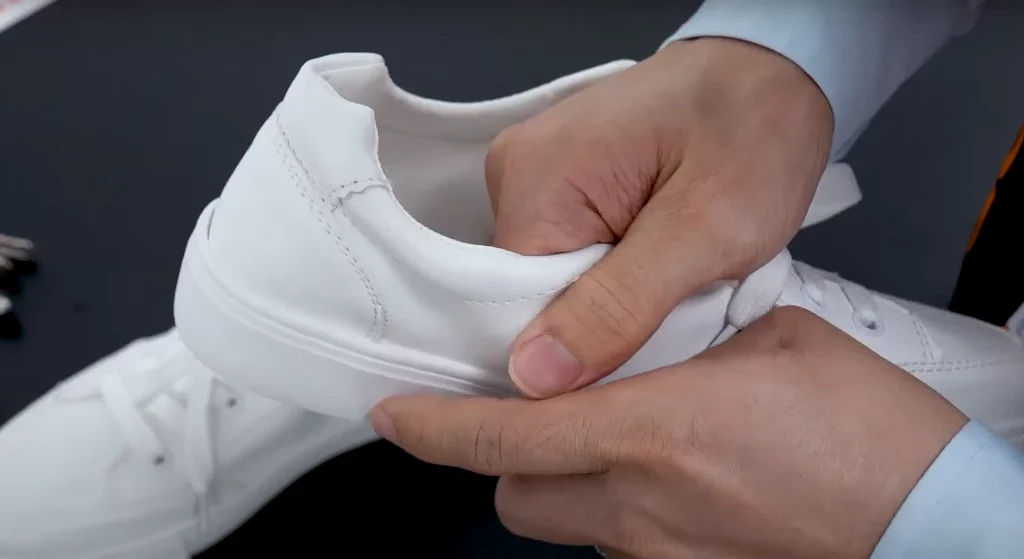
Fitting Check
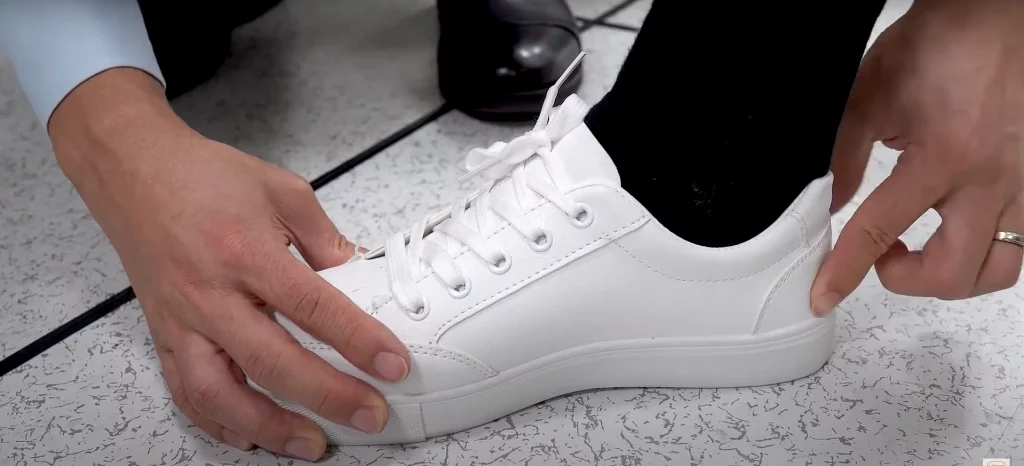
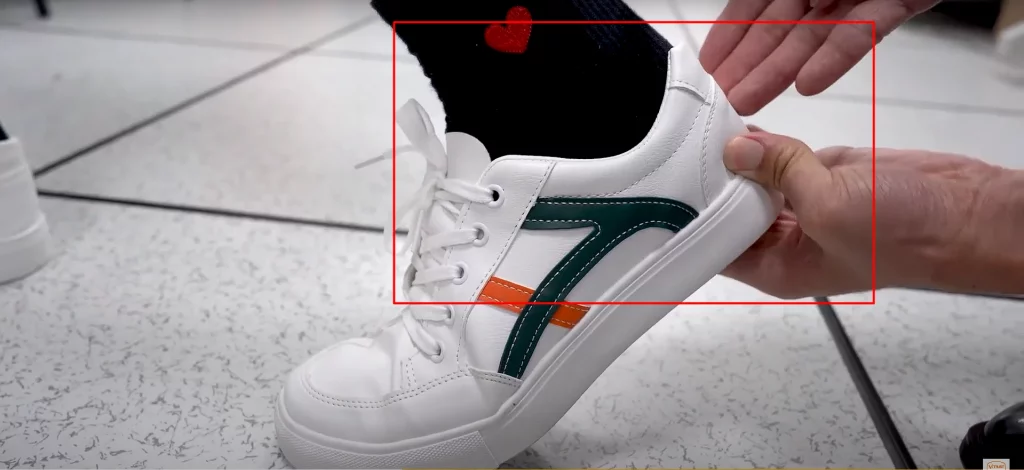
The fitting check is usually conducted by actual use to understand the comfort of fitting and shoe quality. When put on, there should be no gaps between the shoe and foot, and flexing should be comfortable if any shoe has a gap that creates discomfort when in use. It is also possible to measure shoe quality when one leg kneels. Paul marks the shoe as a discomfort shoe if any gap is detected between the shoe and the heel when kneeling.
Appearance Check & Size Measurement
As part of the appearance check, the symmetry and quality of the products are examined. Paul makes sure that there is no color difference, sewing effects, or missing accessories on the shoes. For a size check, the size of the insole is measured and recorded. As well as any other specifications the customer may have.
Weight measurements
Before any test runs, Paul weighs the whole shoe. The US, where most of Footwear Guru’s users are from, uses ounces. But some of them come from countries that use the metric system, so with the help of Paul, I report the weight in both ounces and grams. The scale is accurate to the nearest 1g/0.05ounce.
Width measurements
Paul measures the base of the shoe at its widest point, which is where the forefoot and heel meet. He uses a caliper with an 8-inch outside diameter that is accurate to.1 mm.
He also measured the width of the upper where it meets the midsole in both the forefoot and the heel. Again, where it was the widest.
Deep Check
Deep Check is divided into seven steps.
- Stack heights and heel drop.
- Insole thickness.
- Tongue thickness and gussets.
- Outsole thickness.
- Outsole hardness.
- Midsole hardness.
- Heel Stiffness.
- Breathability.
Stack heights and heel drop
To determine the proper drop and stack measurements, Paul cut the shoe in half and then determined the length of the inside of the shoe.
The shoe is flattened to eliminate any bend or rocker, takes measurements from where the strobe boards meet the heel, and curves upwards from the heel counter until the inner edge of the bumper on the toes. He utilizes an electronic digital scale that is accurate to .01 mm.
This is in line with how World Athletics measures the stack heights of running shoes to determine eligibility requirements.
Paul takes all stack measurements with the insole included, regardless of whether the insole can be removed. Measurements of drop are a straightforward estimation of the heel stack and the forefoot stack.
Insole thickness

Paul takes out the insole, measures how thick it is in the middle of the heel, and makes a note of whether it can be taken out or not.
Tongue thickness and gussets
Paul looked at the thickest part of the tongue to figure out how thick it was.
He also takes note of whether and how it’s stitched to the shoe.
Some choices for gussets are:
- None
- 1 side
- Both Sides (fully-gusseted).
- Both sides (semi-gusseted).
Outsole thickness
There are a few ways to measure the outsole. Paul measures the thickness of the outsole in the forefoot and heel, as well as the thickness of any lugs, with the shoe cut in half (for example, on trail shoes).
Any lug is measured from the bottom of the lug to the very edge of the lug. The thickness of the base outsole is not taken into account.
Outsole hardness
Paul also uses an HC durometer at room temperature to measure how hard the material on the bottom/outsole of the shoe is.
Midsole hardness
Paul uses a HA durometer to measure the hardness of the midsole foam in the heel of the shoe at room temperature. If the midsole foam has two different densities, we also measure the hardness of both of those.
He also put the shoe in a freezer set to 0 degrees Fahrenheit for 20 minutes and took another measurement of how hard the foam was. This was done to simulate how the shoe would work in cold weather.
Heel Stiffness
On a subjective scale from 1 to 5, with 5 being the stiffest, heel stiffness is measured by squeezing the sides of the heel counter and pushing on the back of the heel counter.
Breathability
On a subjective scale from 1 to 5, 5 is the most breathable. This is done by filling the shoe with smoke made from dry ice and boiling water.
About 1 cup of dry ice chunks are put in a bowl with 2 cups of boiling water to make smoke for each shoe. A fan is used to push the smoke through the shoe.
Leather Shoes/Boots
There is a slightly different process for checking quality for boots/shoes like Ariats that are specially leather. To avoid fake Ariat boots you should know how to spot fake Ariat boots. This process consists of two extra steps:
- Check the leather quality.
- Stitching Or Glue Check.
Checking the leather quality

Most of the time, real leather shoes are heavier than fake leather shoes. So Paul always checks by comparing the weights of two pairs.
Original leather shoes have a unique smell that other shoes can’t match, no matter how many chemicals are used to make them smell like the originals. Next time, don’t be afraid to smell the shoes.
You can touch the shoe and feel the tiny pores and fine lines. It is not real leather if it feels like plastic. On the other hand, if they feel smooth and have a smooth shine, you probably got the shoes you were looking for.
Leather is a natural material, so it can get moldy. This can happen when the leather is being shipped or if the leather, shoe parts, or finished shoes are not stored properly.
So, Paul’s habit of always looking for molds is also a key part of picking good leather shoes.
Stitching Or Glue Check

Shoes made of leather are made of many parts that are sewn or glued together.
Since there are a lot of different ways to make it, it can be hard to keep the quality of the connections between the different parts the same. But Paul carefully checks all the places where stitches and glue are used and gives me a full report.
What makes our reviews unique
1. All shoes that we review are brought with our own money.
The brands don’t send our testers any free shoes. This is to avoid bias and brand loyalty.
So Paul and I are free to say what we really think.
2. We focus on what we feel, not what the shoes look like.
Most reviews of shoes follow a standard format: outsole, midsole, and upper. They give technical details about each part, but they don’t talk about how the shoe works as a whole. Our reviews are written so that you can “feel” the shoe as if you were actually trying it on.
Last Words
In conclusion, always be sure to check the quality of footwear before purchasing. Poor quality footwear can cause serious injury and may even lead to lawsuits. Be sure to choose footwear that is both comfortable and safe for your feet, and always check the review of Footwear Guru. Thank You.